 Email Id :-
 Mobile: -


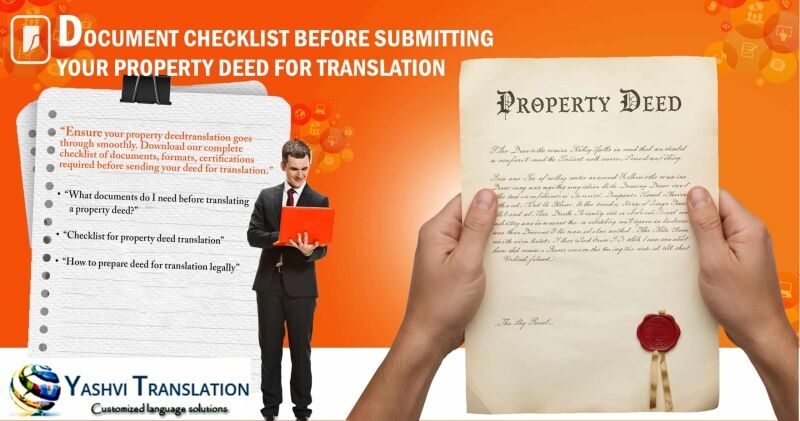
Document Checklist Before Submitting Your Property Deed For Translation

Avoid Rejection — Prepare Before You Translate
Translating a property deed is not just about converting words—it’s about ensuring that the translated version is legally acceptable, matches the original exactly, and passes scrutiny by courts, land registries, banks, and notaries. Many translation providers reject or delay due to missing pages, unclear scans, missing certifications, or mismatches.
That’s why preparing diligently beforehand can save you time, cost, and legal hassles.
At Yashvi Translation, we have refined a comprehensive Certified Property Document Translation checklist that every client must fulfill before submitting a deed for translation. Use it to avoid translation rejection, authority feedback, or costly rework.
Below is your definitive checklist, best practices, common pitfalls, and next steps.
What Is This Checklist For — And Why It Matters
Purpose of the Checklist
-
- Ensure your translator receives complete, high-quality source material (every page, seal, signature, annexure)
- Enable accurate clause-to-clause translation, minimizing ambiguity
- Make sure the translated deed is certifiable, notarizable, and acceptable to authorities
- Prevent translation delays, authority rejection, or re-submission with amendments
Who Needs to Use It
-
- NRIs and foreign investors submitting deeds for translation
- Lawyers, notaries, conveyancers preparing documents for cross-border property cases
- Banks or lenders receiving translated deeds as collateral / documentation
- Local registries or courts requiring translated versions from clients
Use this checklist as a pre-submission quality gate—check off each item before sending your deed for translation.
If you’re based abroad, explore our Property Document Translation for NRI Owners in UAE · USA · UK · Canada page for tailored support.
Document Checklist Before Deed Translation
Below is a structured, item-by-item checklist. (You may convert this into a downloadable PDF / interactive form.)
Need help understanding different deed types? Read Types of Property Deeds in India and Their Translation Needs before you start.
| Category | Document / Item | Why It’s Needed | Tips & Notes |
| Core Deed Documents | Original deed (all pages) | So translator has the full context — recitals, clauses, schedules, annexures | Ensure scans of front, back, inside pages, including blank pages |
| All annexures, enclosures, exhibits | Many deeds refer to these; missing enclosures break context | Label each annexure clearly (Annexure A, B, etc.) | |
| Registered / stamped / registered signature pages | To validate authenticity, locate stamps / seals | Highlight stamps or embossed seals for clarity | |
| Previous title deeds / chain of title | To cross-reference names, transfers, boundaries | Helps maintain consistency in translation | |
| Identification & Verification | Identity proof of parties (passport, Aadhaar, PAN, etc.) | Helps cross-check names, spellings, addresses | Provide the version that corresponds to the deed |
| Address proof (if applicable) | Ensures address consistency in translation | Use correct format (e.g. official address document) | |
| Legal & Supporting Documents | Encumbrance certificate (EC) | To show whether there are prior charges / mortgages | Provide entire period report, not only recent years |
| Mutation / Revenue records | Confirms official record of ownership / transfer | Helps with alignment to government records | |
| Survey maps, site plan, plot plan | For location, boundaries, area clarity | High-quality scans / drawn maps help reduce mistakes | |
| Approved plan, building permit, municipal approvals | If the deed mentions them, they must be translated | Crucial in urban / development properties | |
| Power of Attorney (if used) | If a POA was used to execute the deed, you must translate it too | Provide the registered POA document version | |
| State / Local Documents | Local municipal / land records (e.g. Khata, RTC, Fard) | To align with local names, plot numbers, land classification | Helps translators with regional terminology |
| NOC / No objection certificates (if any) | Some deeds mention NOC from society / utility / builder | Provide NOC documents as attachments | |
| Technical / Format Requirements | High-resolution scans / images | Blurry or low-res scans hamper translation accuracy | Use ≥ 300 dpi, clear contrast, color if needed |
| Clear labelling (page numbers, side notes) | Helps translator map original → translated pages | Retain original numbering / footnotes | |
| OCR or editable text (if available) | Saves effort, reduces errors | But always include original scanned image too | |
| Certification & Legalization Instructions | Stamped & signed translation certification format | So translator adds correct legal clause | Provide the required sample certification text |
| Notary / Sworn translator stamp if needed | If destination requires notarization | Indicate whether notary or sworn translation is needed | |
| Apostille / Embassy legalization info | If translation will be used abroad | Provide target country jurisdiction info | |
| Delivery / Contact Info | Contact email, legal representative name / phone | So translator can query ambiguities or clarifications | Provide best point of contact |
| Delivery preference (digital, physical courier) | So translator prepares final output accordingly | Indicate whether hard copies needed | |
| Revision / Clarification Clause | Authorization for minor clarifications / queries | Early agreement to handle follow-up queries | Helps avoid delays mid-process |
Related reading: Property Document Translation Process — how we maintain accuracy and certification integrity.
Best Practices & Common Pitfalls (for High-Risk Awareness)
Best Practices
-
- Provide the highest quality, clean scans or original PDFs (not photos taken at odd angles)
- Always include all pages, even blank ones (some deeds number pages including blanks)
- Use side-by-side dual format (original next to translation) in your final deliverable
- Whenever possible, supply reference translations / prior translations / style glossaries to maintain consistency
- Clarify certification / notarization / apostille requirements at submission time
- Be ready to respond to translator’s clarification queries, e.g. ambiguous terms, unclear stamps
- Specify certification or Notarization and Apostille requirements at submission time.
- Maintain version control — if any additional amendment is given later, resubmit as a fresh task
Common Pitfalls & How to Avoid Them
| Pitfall | Likely Consequence | Prevention |
| Blurry / low-resolution pages | Misreading serials, stamps, footnotes | Use high dpi scans, ensure clarity, avoid shadows |
| Missing annexures or exhibits | Translation becomes incomplete / invalid | Cross-check deed’s table of contents / reference parts |
| Inconsistent names / spellings | Registrar rejects due to mismatch | Provide identity proof to reconcile spellings |
| Unstamped or unsigned pages | Authorities question authenticity | Include all stamped pages, especially signature pages |
| Late requests for apostille / legalization | Project delays, extra cost | Specify legal requirements upfront |
| Changes / amendments mid-translation | Rework, version mismatch | Lock document set before translation begins |
Avoid all these by reading Top Mistakes People Make When Translating Property Documents.
How Translators Use This Checklist – Workflow & QA
Our certified translators follow a five-step process aligned with the Contract Real Estate Agreement Translation workflow:
Step 1: Intake & Document Verification
✅ Upon submission, the translation team verifies the checklist.
✅ If any required document is missing or unclear, translator raises clarification before proceeding.
Step 2: Clause Mapping & Layout Preservation
✅ The translator matches clause numbering, footnotes, page layout, annexures.
✅ They may insert translator’s notes for ambiguous parts or missing sections.
Step 3: Draft Translation & Peer Review
✅ Legal translator produces version, then a second review ensures consistency, legibility, and fidelity.
✅ The review particularly checks legal terms, cross references, names, dates.
Step 4: Certification & Legalization Addendum
✅ The translator adds a certification clause (as required).
✅ If notarization, apostille, or embassy legalization is needed, they follow the instructions you provided.
Step 5: Delivery & Clarification Support
✅ Final deliverable includes side-by-side layout, translation text, and certification pages.
✅ Translator remains available to respond to authority queries or minor corrections.
This structured workflow depends on you providing a complete, well-prepared submission via the checklist above.
Learn how we executed this in practice in our Case Study: Certified Property Deed Translation – NGE Green Energy.
FAQ
Q: What documents do I need before sending a property deed for translation?
A: You need the complete original deed (all pages, annexures, exhibits), identity & address proofs, encumbrance certificate, survey map, and any supporting approvals or NOC documents. Also specify whether notarization, apostille, or legalization will be required.
Q: Do I need to submit previous title deeds or chain of ownership?
A: Yes — previous title deeds help the translator maintain consistency in names, boundary descriptions, and historical references.
Q: Can I submit photos instead of scanned PDFs?
A: It is not advised. Photos may distort stamps, footnotes, boundary lines, or faint text. High-resolution scanned PDFs ensure greater fidelity and accuracy.
Q: Should I tell the translator my target country’s legalization needs?
A: Absolutely. If your translated deed must be apostilled or legalized for use abroad, you must indicate that upfront, so the translator includes the proper certification and compliance steps.
Q: What’s the risk of missing annexures or exhibits?
A: Missing documents can break legal references in deed clauses, render the translation incomplete, or lead to rejection from authorities or registries.
Q: Can I send partial pages or blank pages omitted?
A: Always include every page, including blank ones, because some deeds number blank pages or contain footnotes referencing “next page blank” clauses.
Next Steps
Ready to have your property deed translated smoothly and accepted without fuss? Follow these steps:
- Use the above checklist to gather and verify all required documents.
- Upload everything together via our secure portal (scanned originals + annexures + identity proofs).
- Let us know if you need notarization / apostille / legalization — we’ll include it in the quote.
- Receive a free, itemized quote within hours.
- We proceed with translation, certification, and deliver the bilingual document (original + translated side-by-side).
- We support you post-delivery — if the registry, court, bank, or authority has queries, we respond or revise within agreed scope.
At Yashvi Translation, we pride ourselves on legal rigor, translation precision, and a client-friendly process. Use this checklist to ensure your deed translation submission is flawless.
Contact us now to get started — or download a PDF version of the checklist for your reference.
Recent Clients Review


